The first part of this procedure is the same for every streaming provider. After this first setup, there is a specific part dedicated to displaying the song titles, which is different depending on your streaming service.
VERY IMPORTANT INFORMATION
It's impossible to play an "HTTP" stream through an "HTTPS" website. If your website uses HTTPS, also your streaming url needs to be in HTTPS. This is not a theme limitation, is a new security measure now adopted by any modern browser and device.
How to create a radio channel
Step 1: Find out your radio streaming URL. If you don't know it yet, please check the page dedicated to your specific streaming type for more info
Step 2: in your WordPress Admin, go to Radio Channels > Add new channel
Step 3: enter the name of the radio channel, and optionally the music genres (are like tags)
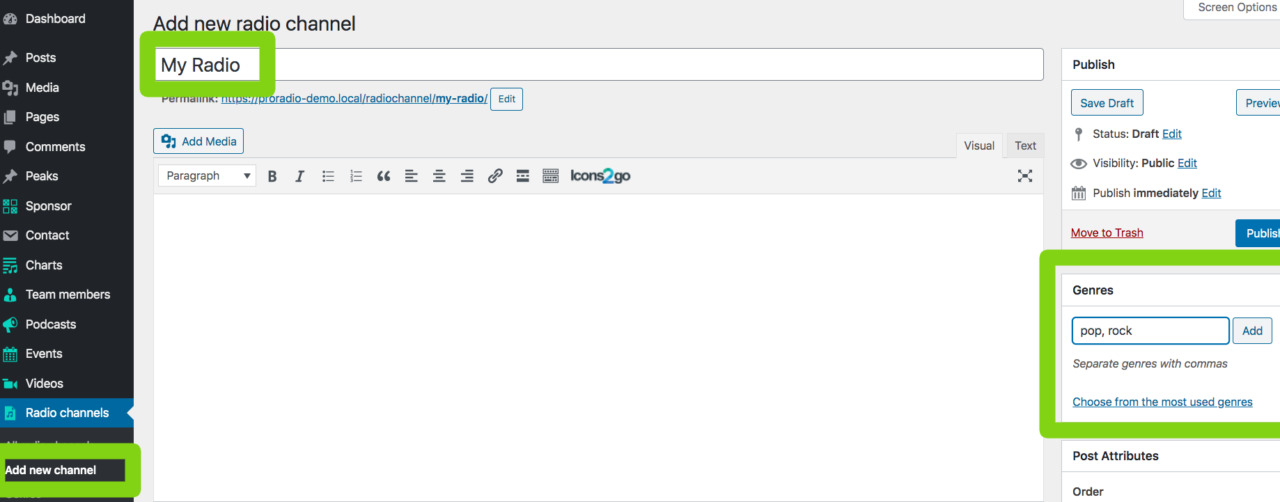
Optionally, add a content description for the radio channel, that will be visible when opening the single page of the radio channel.
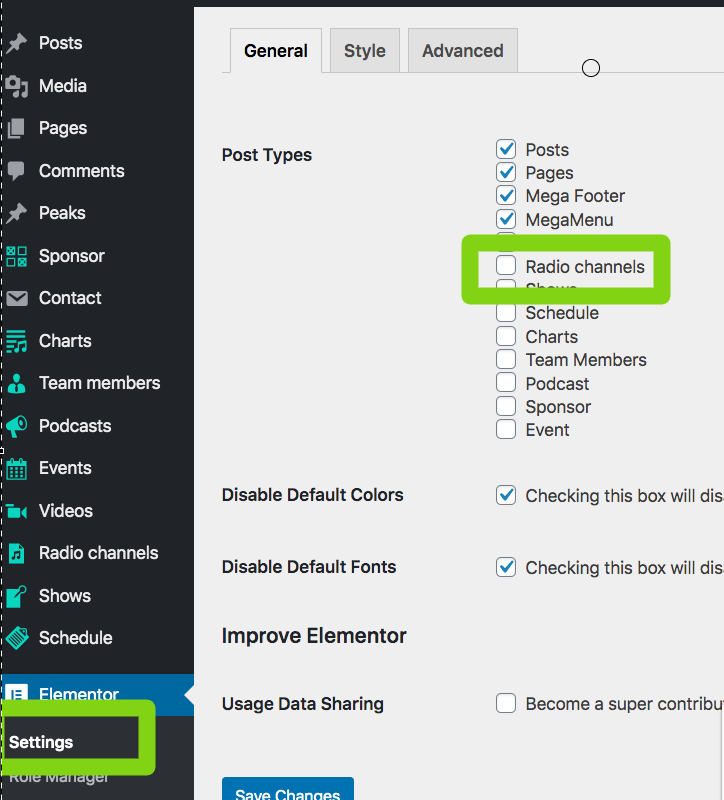
If you want to edit this page using Elementor, you need to enable the post type "Radio channels" in the Elementor settings
Step 4: optionally add the Order attribute. This parameter will modify the order in the Playlist within the radio channels of your playlist.
Radio channel details
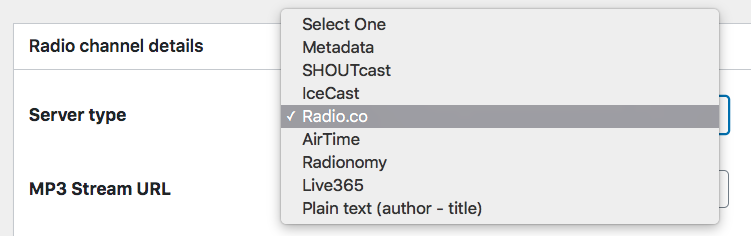
Step 1: set your Server Type. This is an information you should already know. If you don't, please ask to your streaming provider.
If your provider allows you to choose among the Icecast and the Shoutcast formats, we suggest using Icecast because of its native HTTPS compatibility.
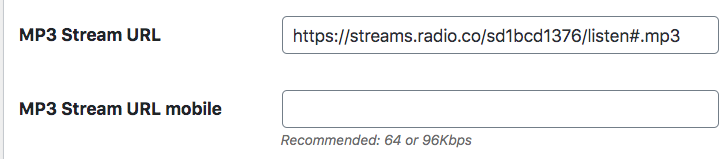
Step 2: MP3/OGG/AAC Stream URL: the URL of your stream (see dedicated sections for each provider ofr more info).
Please notice that if your website is in HTTPS, your streaming URL needs to be in HTTPS as well.
Step 3: MP3/OGG/AAC Stream URL mobile. This URL will be automatically used if the player detects a mobile device. Some streaming providers will allow to set 2 different mitrates, that can be accesses from 2 separate URLs.
For mobile, you may want to use 64 or 96 kbps, while for Desktop also 128 - 320 kbps is good.
Step 3: Radio subtitle. Will be used instead of the Artist name, if missing.
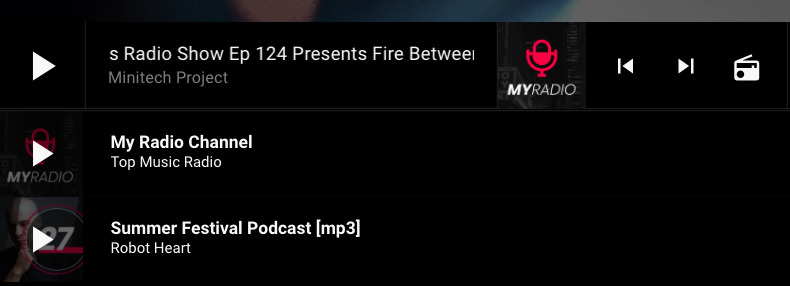
Step 4: Radio Logo. You should upload a logo in PNG wih transparent background that will be used as page title for the single radio page. It will also be used in the Radio Cards: an Elementor widget to print out a tiny playable card containing the radio logo and the Play button, on a custom background.
![]()
![]()
Step 5: Player icon - a squared image, suggested size 600x600px, that will be used in the player while playing this channel.
Mobile view:
![]()
Desktop view:
Step 6: Exclude from playlist - this option allows to hide a radio channel from the player without deleting it. If you check this checkbox, the channel will still be available via shortcode or single page, but won't be preloaded in the playlist of the player bar.

Use Proxy: this option involves only the access to the song titles, and changes the Ajax call to a server side connection to read the titles of the songs from your streaming provider. It's necessary when your streaming provider has POOR CORS (cross origin resourse sharing) settings, meaning that your streaming provider is blocking you from reading the titles.
When to use the proxy:
If you are sure you set up correctly the streaming settings and still the titles are not appearing (see next chapters for the titles setup) you should check the Console of the browser
To open the developer console in Google Chrome, open the Chrome Menu in the upper-right-hand corner of the browser window and select More Tools > Developer Tools. You can also use the shortcut Option + ⌘ + J (on macOS), or Shift + CTRL + J (on Windows/Linux).
If you see an error saying
"XMLHttpRequest cannot load http://.........../. Origin [YOUR SITE URL] is not allowed by Access-Control-Allow-Origin."
It means that your radio provider is blocking external websites from reading the titles. This is not a theme bug, is a problem of your radio provider, who has wrong server settings.
Our internal proxy tries to bypass the issue, even though is not very recommended and may still be blocked by your own server settings.
The proxy converts the connection made via javascript to a connection made via PHP to your streaming provider.
So, if your streaming provider has an URL like
http://someurl.com:9374
IMPORTANT: if your radio stream is on alternative ports, like 8000, or any other port like 1234 (you’ll see your URL containing for example “:5274”) the proxy can only work if your server is NOT blocking the connections.
To use the proxy, you need to ask to your website hosting provider to enable the connection to the URL http://someurl.com and tot he port 9374 (or whatever port you use).
This is NOT an audio proxy, only works on the json song titles call.
If the proxy doesn’t work for you, or you see a console error “unexpected character at line…<” it means your server is blocking the proxy calls.
The are only 2 solution:
- Ask your streaming provider to enable the CORS (and disable the proxy) OR
- Ask your website hosting provider to allow the connection on your specific streaming port number.
Using the proxy is not always a good idea: is a workaround to bypass a problem caused from your streaming provider, and move it to your hosting provider. The proxy can increase a lot your consumed bandwidth and CPU server usage.
Is a bit like if your home door is stuck and you try to get in from the cheminy. Is a backdoor, not a solution.
Also, if a provider has the CORS permissions disabled, is not in general a professional provider, and you may want to find a better one.
Server-specific instructions
In the next chapters you will find the exact instructions to display the song title and artist name on the player and other parts of the website, for any supported type of streaming provider.


